

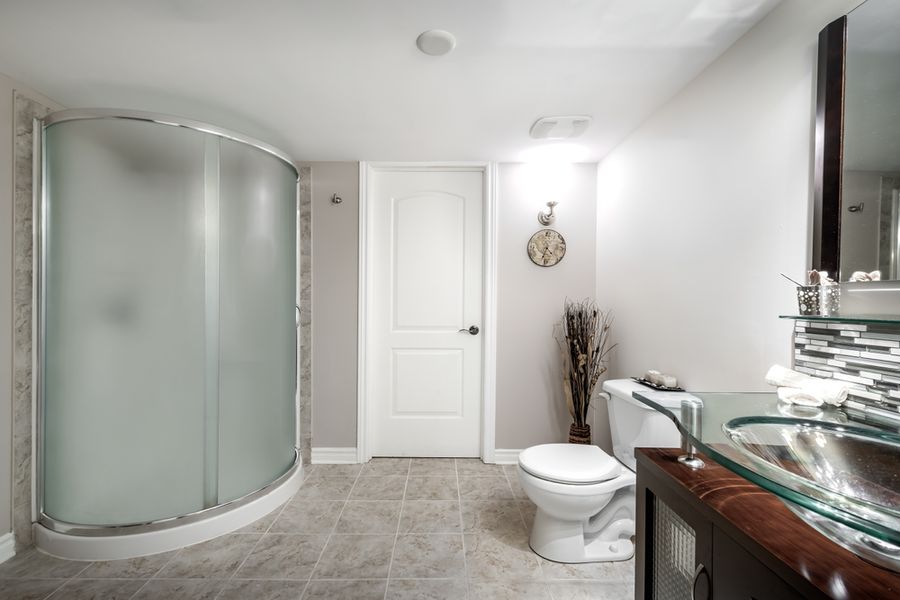
Adding a basement bathroom to an older home can make the lower level more practical, but the project often presents challenges that newer construction does not. Existing drain locations, low ceilings, aging pipes, concrete floors, and moisture problems can all influence what is possible. Instead of forcing a standard bathroom design into a difficult space, homeowners can often get better results by choosing a layout and plumbing solution that work with the home’s existing conditions.
Let the Existing Plumbing Guide the Layout
The best location for a basement bathroom is not always the empty corner that looks most convenient. Before settling on a floor plan, determine where the home’s main drain, plumbing stacks, water lines, and existing bathroom connections are located. Keeping new fixtures reasonably close to suitable plumbing can shorten pipe runs and reduce the amount of concrete or finished construction that needs to be disturbed.
Drainage deserves particular attention because wastewater normally relies on gravity. Horizontal drainage pipes need adequate slope, and the available elevation beneath a basement floor can limit where a toilet, shower, or sink can be placed. In an older house, previous renovations may also have left behind a mixture of pipe materials or undocumented connections. Locating and assessing the existing system before demolition can prevent a seemingly simple layout from becoming unnecessarily complicated.
Decide Whether Gravity Drainage Will Work
If the existing building drain sits low enough, a conventional gravity system may be the most straightforward solution. Sections of the concrete slab can be opened so new fixture drains can run beneath the floor and connect to the existing sanitary drainage system. Careful planning can keep this work relatively focused rather than assuming that a large portion of the basement floor must be removed.
Grouping fixtures can help. Placing the toilet, shower, and vanity along the same wall or within a compact plumbing zone may reduce underground pipe runs and make venting and water-supply routing easier. Before cutting the slab, however, the proposed route should be confirmed. Older basements may contain plumbing, utilities, or previous alterations that are not visible from the finished surface, so exploratory work and professional evaluation can be much less disruptive than discovering a conflict after excavation begins.
Use an Ejector System When the Sewer Is Too High
Some older basements sit too low for new bathroom fixtures to drain naturally into the building sewer. When wastewater cannot reach the sewer through gravity, a sewage ejector can lift it to a point where it enters the home’s gravity drainage system. Model residential plumbing provisions specifically address this situation, calling for below-grade drainage that cannot discharge by gravity to enter a covered, vented sump and then be lifted by automatic pumping equipment or another approved method.
A typical ejector installation requires more planning than simply selecting a pump. The basin, discharge line, vent, valves, electrical supply, and service access all need appropriate locations. Current model provisions also require access to valves associated with the pump discharge. Building accessible mechanical components into the original design is far smarter than concealing them behind permanent cabinetry or tile that may later need to be removed for maintenance.
Consider Above-Floor Plumbing When Concrete Is a Problem
Breaking open an older concrete slab is not always desirable. A bathroom may be planned in a finished basement, the slab may be difficult to excavate, or the homeowner may want to limit demolition. In some situations, an approved macerating toilet or pumped-waste system can allow waste to be moved without placing all of the new drainage piping beneath the floor. Such systems are recognized in current model residential plumbing provisions and must be installed according to applicable standards and manufacturer instructions.
This approach can be useful, but it changes the nature of the bathroom. Instead of relying entirely on gravity, the room depends on mechanical equipment, so power, noise, fixture compatibility, venting, capacity, and future maintenance become important considerations. Homeowners should compare those tradeoffs with conventional below-slab plumbing rather than assuming that avoiding concrete work automatically makes an above-floor system the better choice.
Fix Moisture Problems Before Closing the Walls
A basement bathroom introduces water and humidity into a part of the house that may already struggle with dampness. Signs such as foundation seepage, water stains, musty odors, condensation, efflorescence, or recurring mold should be investigated before framing and finishes hide them. Moisture problems in a basement should be corrected before the space is converted or remodeled because persistent dampness can contribute to mold and damage to building materials.
The solution may be relatively simple, such as redirecting downspouts or improving grading so water moves away from the foundation, or it may involve more substantial drainage or waterproofing work. Resolving the source first is more effective than choosing moisture-resistant finishes and hoping they conceal the problem. Once the room is built, shower surrounds, flooring, penetrations, and other wet areas should also be detailed to limit water from entering concealed wall and floor cavities.
Give the Bathroom a Real Exhaust Route
Ventilation is particularly important in a basement bathroom because showering can add substantial moisture to a space that may have limited natural air movement. The exhaust fan should send humid air directly outdoors rather than dumping it into a joist cavity, utility room, or another enclosed part of the house. Current model residential code also requires air removed by mechanical exhaust systems to discharge outdoors.
Plan the duct route before framing the ceiling. In an older basement, beams, heating ducts, plumbing lines, masonry walls, and finished rooms above may block the most direct path outside. Choosing the bathroom location partly around a practical exhaust route can eliminate long, awkward duct runs and unnecessary soffits later.
Design Around Low Ceilings and Existing Obstacles
Headroom is another common problem in older basements. Main beams, ductwork, pipes, and previous renovations may create several different ceiling heights within the same room. Instead of automatically relocating everything overhead, place fixtures according to where the available height is most useful. A shower needs comfortable standing clearance, while a vanity may fit more naturally in an area affected by a soffit or obstruction.
As a reference point, the 2021 model residential code establishes a minimum ceiling height of 6 feet 8 inches for bathrooms and toilet rooms, with specific provisions around fixtures and certain basement obstructions. Requirements for existing buildings can differ, and jurisdictions across the United States adopt and amend building codes differently. Checking local rules before finalizing the room can reveal whether an existing low ceiling is acceptable, needs modification, or changes where a fixture can be installed.
Use the Renovation to Address Older-Home Hazards
Opening floors and walls in an older basement may uncover more than inconvenient plumbing. Renovation work can disturb materials that were previously sealed or left untouched. Homes built before 1978 may contain lead-based paint, and renovation work that disturbs painted surfaces in qualifying pre-1978 housing is subject to federal lead-safe requirements. Suspected asbestos-containing materials should likewise be evaluated rather than casually cut, sanded, or demolished.
A basement renovation is also a sensible time to think about radon. Testing the lowest lived-in level is recommended, and addressing elevated radon can be easier before basement walls and floors are fully finished. These issues are not exclusive to bathroom projects, but a renovation that opens previously inaccessible areas creates an opportunity to identify them before the basement becomes harder to alter.
Keep Future Repairs in the Plan
A basement bathroom should be designed not only for the day construction finishes but also for the years afterward. Pumps, shutoff valves, cleanouts, and other serviceable plumbing components should remain accessible. Model plumbing provisions require access to the working parts of backwater valves, for example, and sewage-ejector components also include specific access requirements.
Removable access panels, thoughtfully positioned mechanical equipment, and sensible fixture placement may not be the most exciting parts of a bathroom design, but they can prevent a routine repair from turning into demolition. This is especially valuable in older homes, where the bathroom may eventually need to be serviced alongside plumbing that has already been in place for decades.
Build the Bathroom Around the House You Have
Adding a basement bathroom to an older home does not require pretending the basement is new construction. Its quirks should shape the solution. A favorable sewer elevation may allow conventional gravity drainage, while a difficult one may call for an ejector or approved pumped system. Low ceilings can guide fixture placement, existing stacks can influence the floor plan, and moisture conditions should determine what work happens before finishes are installed.
The smartest project is therefore not necessarily the one with the most elaborate bathroom. It is the one that solves the basement’s underlying constraints with the least unnecessary disruption. By evaluating drainage first, controlling moisture, planning ventilation, preserving service access, and checking local requirements before construction begins, homeowners can add a bathroom that works with an older house rather than fighting against it.